Posts tonen met het label Taste and Create. Alle posts tonen

maandag 26 april 2010

Taste & Create: Mrs. B's Lemon Meringue Pie


Just a short post today. This is the second recipe I made for April's Taste & Create. I was paired with Jen of The Misadventures of Mrs. B and apparently she loves lemony desserts as much as I do. As soon as I found this lovely Lemon Meringue Pie I knew I had to make it. I have always been intimidated by meringue and was super-excited by the thought of finally tackling it!


In fact I was so excited that I made one huge mistake.... I cut the pie when the custard wasn't quite set yet.... Oops!! So the first piece looked like crap, it tasted wonderful though! For the crust I used Dorie Greenspan's recipe for Sweet Tart Dough (page 444 of Baking From My Home To Yours) or here. I used the juice of 5 lemons for this and that amount was ideal: the perfect flavor combination with the tartness of the crust and the sweetness of the meringue.


After some time in the fridge the custard set as it was supposed to and looked gorgeous. The recipe can be found here over at The Misadventures of Mrs. B, go check it out! I know I will be frequenting Jen's blog from now on to see what other scrumptious dishes she comes up with!


zondag 25 april 2010

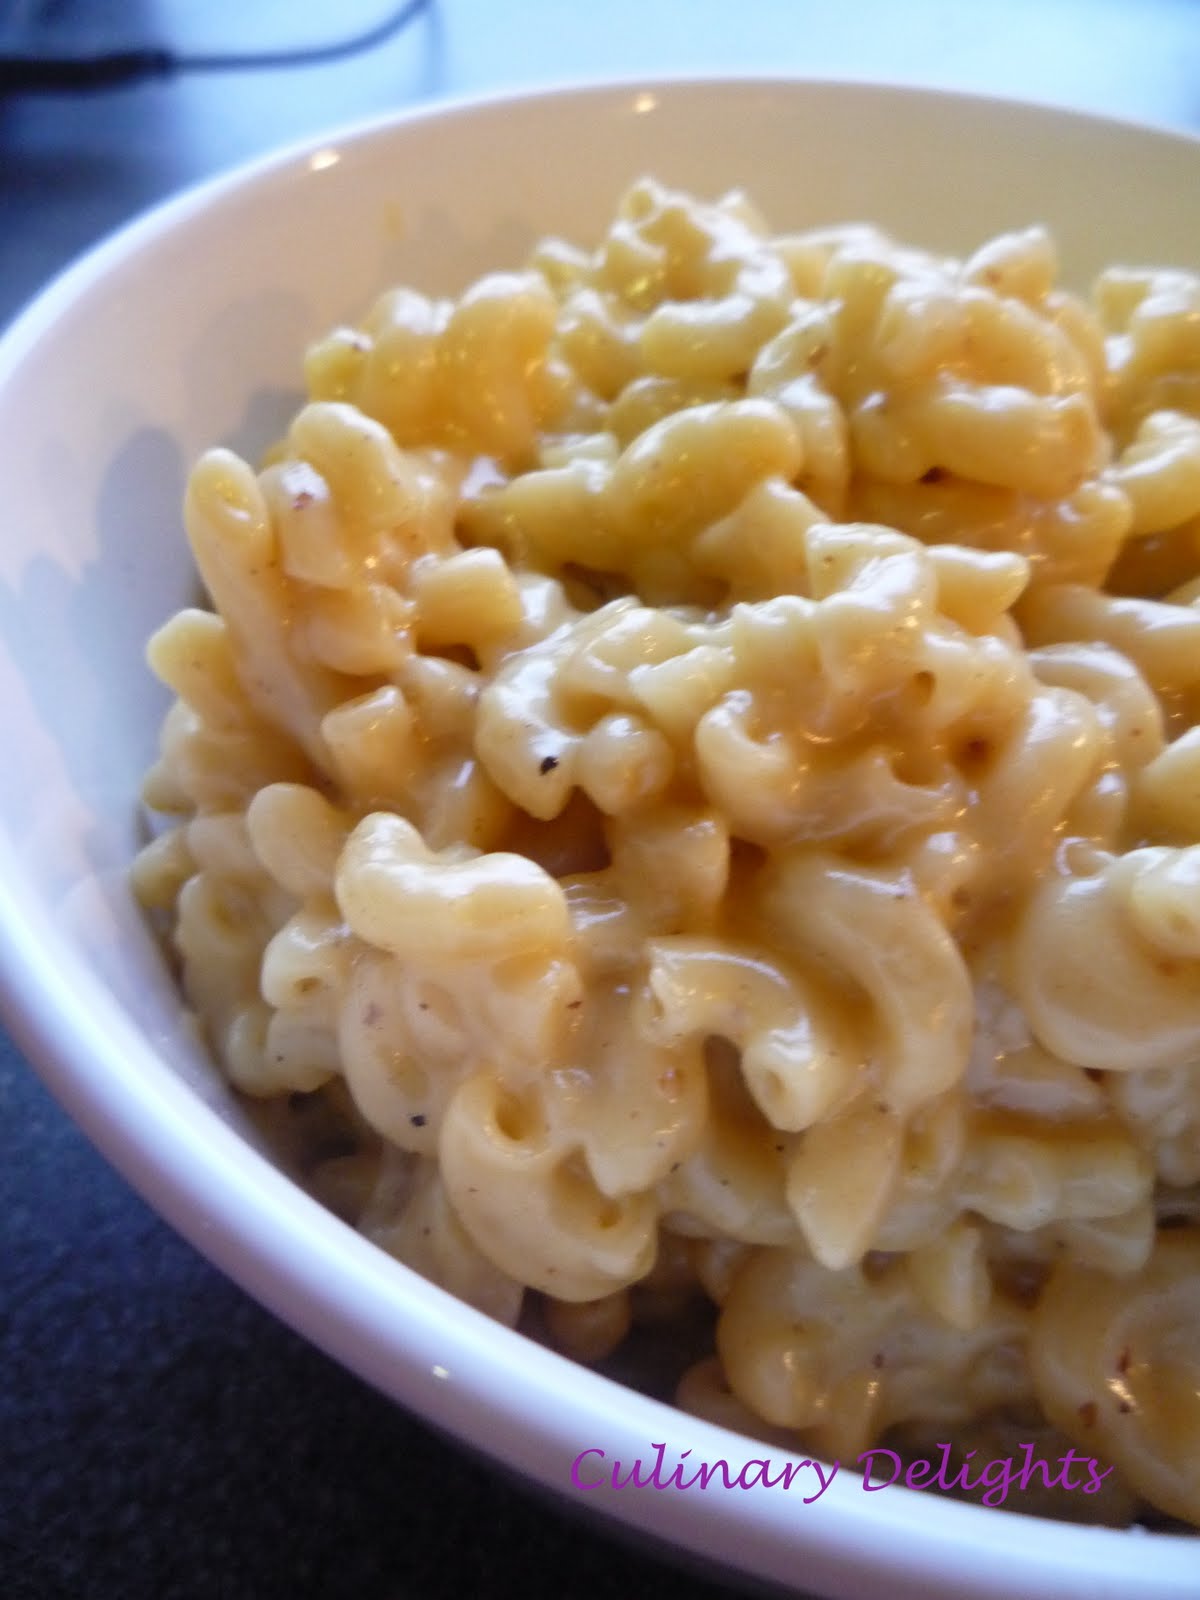
Taste & Create: Mrs. B's Super Easy, Super Cheesy Stovetop Macaroni

It´s that time of the month again: time to post about Taste & Create. Like I mentioned before, Taste & Create is a cultural exchange program for bloggers: you sign up monthly and are paired with another blogger. You look around at their blog, find that one recipe (or more if you like) that you want to recreate and post the about it. You also submit a picture and a very short review to the T&C website.

This month I was paired with The Misadventures of Mrs. B. I had so much fun reading her blog, she and I share a love for cheese and citrus. So I had to pick two recipes: this one I'll post today, the other (Lemon Meringue Pie) will follow this week. The first recipe I picked was super easy to make and involved cheese :) It was nice, but somewhat bland. I wonder if the Cheddar that is available here might have less flavor than the American ones..... It was still yummy thought!


The recipe can be found here at The Misadventures of Mrs. B.


vrijdag 9 april 2010

Taste & Create: Ukranian Honey Cupcakes with Dulce de Leche Buttercream


This post is well overdue, it was supposed to go up before March 24 but I totally forgot about it... Luckily Min from The Bad Girl's Kitchen was so kind to send me a reminder through email. This month I was paired with tittilating eatables, she only started blogging in February 2010 but the stuff you see on her blog is amazing!! I decided on adapting her Ukranian Honey Cake by turning it into cupcakes and topping it with Dulce de Leche Buttercream. So here´s my late entry for March´s Taste & Create: Ukranian Honey Cupcakes with Dulce de Leche Buttercream.


Before I tell you all about these cupcakes, let me tell you a bit more about Taste & Create. Basically Taste & Create is a cultural exchange program for bloggers, you sign up monthly and are paired with another blogger. You look around at their blog, find that one recipe (or more if you like) that you want to recreate and post the about it. You also submit a picture and a very short review to the T&C website.


So basically what I did is make the recipe I found at tittilating eatables and divided it over cupcake liners. I then baked the cupcakes for about 18 - 20 minutes and let them cool afterwards. To make them extra special I topped them with some Dulce de Leche Buttercream. Go here to check out the recipe I used for the cupcakes: Ukranian Honey Cake.


Dulce de Leche Buttercream
Adapted from Joy the Baker

1 1/2 cups unsalted butter, softened
3 Tablespoons heavy cream
1 teaspoon vanilla
4 cups powdered sugar
pinch of salt
3/4 cup dulce de leche

Cream together softened butter and powdered sugar on low using an electric mixer. Add cream, salt, and vanilla and beat on medium speed until smooth and no lumps appear. Scrape down the sides of the bowl. Add the prepared dulce de leche and beat to incorporate. Frost cooled cupcakes using a knife or a pastry bag and tip.


zondag 27 september 2009

Taste & Create XXIII: Chocolate Peanutbutter Bars


This month I was paired with Chaya of Sweet and Savoury Says it All for Taste and Create.
Chaya's blog is filled with delicious recipes. I wanted to surprise my coworkers with something sweet and was torn between the Snickerdoodle Cookie Bars, the Apple Streusel Topped Muffin and the Chocolate Butterscotch Bars.


Since it was that time of the month the choice was quickly made and Chocolate Butterscotch Bars it was. But then I found out that I hadn't brought home butterscotch chips from my trip to Canada but peanutbutter chips, so I subbed them. The other thing I changed was using butter instead of margarine and I left out the mocha extract. Yummy! This was gone in no time!!


Chocolate Peanutbutter Bars

1 1/8 cup all-purpouse flour
1/2 teaspoon baking soda
1/2 teaspoon salt
3/4 cup packed brown sugar
1/2 cup butter, room temperature
1 teaspoon vanilla extract
1 large egg
1 cup semi-sweet chocolate chips
1 cup peanutbutter chips (I used 3/4 cup peanutbutter chips and 1/4 cup milk chocolate chips because I ran out of peanutbutter chips...)
1/2 cup chopped walnuts (I used pecans)
  • Preheat oven to 375 degrees Fahrenheit
  • Grease a 9-inch square baking pan
  • Mix the flour, baking soda and salt in a bowl.
  • In another bowl beat the sugar, butter and vanilla until creamy
  • Beat in egg
  • Gradually beat in the flour mixture
  • Stir in 1 1/4 cups of chocolate chips and all of the nuts
  • Spread into prepared pan
  • Bake 20 - 23 minutes
  • Remove pan to wire rack
  • Sprinkle with remaining chocolate chips
  • Let stand for 5 minutes or until morsels are shiny; spread evenly
  • Cool in pan on wire rack
  • Refrigerate 5 - 10 minutes or until chocolate is set.

maandag 31 augustus 2009

Taste & Create XXII: Penne in a Creamy Pesto Sauce with Fresh Mozzarella, Grape Tomatoes & Chicken


For this months Taste & Create I was paired with the lovely Poornima of Tasty Treats.
With lots of yummy dishes to choose from I picked another great pastadish: Penne in a Creamy Pesto Sauce with Fresh Mozzarella, Grape Tomatoes and Chicken. I made this when I had a friend over for dinner and we absolutely loved it: this is easy to make and tastes absolutely delicious!!
Go check out what else was made for this months Taste & Create here!!

vrijdag 24 juli 2009

Taste & Create XXI - Sleeping Cookies

A couple of days ago I told you about my first partner for this months Taste & Create, now it's time for my second partner: Carol VR of No Reason Needed.

Looking through Carol's blog I saw a lot of interesting recipes, one being Amish Friendship Bread. Unfortunately I didn't have enough time to make this before the 24th of July. So I picked the Sleeping Cookies, these sounded really interesting.


They are very easy to make, no need to keep an eye on the time as the cookies are put into a warm oven that is turned off and left there overnight. The result? Meringe-like cookies: delicious! Again I forgot to take pictures, since there are no pics left I'm posting Carol's own picture of the cookies here.

Check out the other entries for this month's Taste & Create here.
If you would like to join in on the fun, check out the How it Works!

Sleeping Cookies
2 egg whites
2/3 cup sugar
1 dash salt
1/8 tsp. cream of tarter

Preheat your oven to 350F.

Beat the egg whites until stiff, then gradually add the sugar, salt and cream of tarter. Beat until sugar is dissolved. Stir in walnuts and chocolate or butterscotch bits (I left these out as the recipe didn't specify how much was needed and I had non at hand).

Drop by teaspoon on oiled, foil covered cookie sheet. Put into oven and turn off oven. Leave in all night - do not peek - or during the daytime and left in the oven until it is cold.


maandag 20 juli 2009

Taste & Create XXI - Orange Cranberry White Chocolate Chip Cookies and the Kitchen Gadget my Cat destroyed....


When Min of Bad Girl's Kitchen emailed us about having an odd number of people and asked for a volunteer to take on two people I immediately though: even more fun! So I answered her right back and get to pick recipes from two blogs for this months Taste & Create.


The first person I was linked with is Parita of Parita's World. While looking through all the delicious recipes on her blog I fell in love with her Orange Cranberry Chocolate Chunk Cookies. As this weeks TWD-challenge is more of a dessert I was looking for something I could take with me to work to make sure my colleagues wouldn't rebel against a week without treats.....


These cookies are amazing, the coworkers loved me and the cookies! The only thing I changes was using white chocolate chips instead of regular chocolate. The cookies smell delicious, the edges are crunchy and the middle is chewy: perfect! One tiny thing: I sort of forgot to take pictures of the end product. I know there was one cookie left in the cookie jar at work when I left to go home, so my game plan is to take the camera with me to work tomorrow and take some pictures there. Untill then: just take my word for it: these cookies are sooooo good!!


So here it is, the lonely cookie left in the cookie jar.


One left out of the twenty I took with me into work, not a bad score at all!!


I took some gadgets home with me from Canada, my favorite one is this Palm Zester by Chef'n.


It's so easy to use and zests the oranges/limes/lemons perfectly.


Unfortunately this is what my Palm Zester looks like now...... I know you wonder what happened... My cat Senna is what happened. After I used it yesterday I cleaned it and left it on the kitchen counter to dry. The next thing I know is I wake up this morning with my disfigured Palm Zester in bed right besides my left foot.....


Now I just have to figure out how to get a new one as I haven't seen these around here yet....


Orange Cranberry White Chocolate Chip Cookies

2 cups all purpose flour
1/3 + 3/4 cup sugar
1/2 cup butter softened
1 tsp baking powder
1/4 tsp baking soda
1 tsp + 1 tbsp grated orange peel
1 egg at room temperature
1/2 cup dried cranberries
1/2 cup roughly chopped chocolate chunks or chocolate chips


Preheat the oven at 175 degree C and line the baking tray with parchment paper or butter paper.

Sieve flour, baking soda and baking powder together and keep aside for coating.
Mix together 1/3 cup sugar and 1tsp orange peel nicely and keep it aside.
In a bowl beat together butter, sugar and egg on medium speed until fluffy.
Now reduce the speed and in flour, baking soda and baking powder and beat well.
Add in finely chopped cranberries , orange peel and chocolate chunks and mix well without beater.

Make small 1 inch round balls and roll them in the orange peel sugar coating all the sides.
Place these balls on baking tray and flatten them using back of a glass.
Bake these for 10 to 12 mins or until the sides have turned light brown.
Immediately remove and cool them, store in air tight containers.

Enjoy!!!


woensdag 1 juli 2009

Taste & Create XX: Red Enchiladas with Cheese and Strawberry Cupcakes Cooking Light Style!

I feel soooo ashamed.... I'm actually writing this post one week too late.... A couple of weeks ago, while vacationing in Canada, I was so excited to find out that I was paired with Shelby of The Life and Loves of Grumpy's Honeybunch for this months Taste and Create.

Instantly I knew what I wanted to make, I had two recipes in mind and all the ingredients at hand too! So I knew I would be baking and cooking them as soon as I came home. Well, that didn't happen.... I actually needed an email from Min to remind me... So I cooked and baked the recipes I picked today.


I added some corn to the enchiladas instead of the chicken, simply because I didn´t feel like eating meat today. Other than that the only thing I did was half the recipe so I would end up with 6 tortillas, I figured that would make 3 portions for me, but since I was so hungry today I ate three enchiladas: three more left for dinner tomorrow!! These are amazing, thanks to the chili pepper they had a really nice kick to them, I will definetely be making these again!


As for the strawberry cupcakes: I made the entire recipe and ended up with 48 cupcakes, mine were a bit smaller than Shelby's. These were made in preparation for my birthday, so they won't be frosted untill late saturday evening: just in time for the Tea Party on Sunday. But even without the frosting these taste soooo good, and they're light too!

Be sure to hop on over to The Life and Loves of Grumpy's Honeybunch, as she has lots of wonderful recipes posted on her blog and a lot of them are light and therefore really healthy! Go here to check out what the other made for Taste & Create XX.


Red Enchiladas with Cheese


1/2 cup finely chopped onion
1 cloves garlic, finely chopped
1 tbsp vegetable oil
1/2 cup chicken broth
4 tomatoes, chopped (I used 5 because they were a little small)
1 tbsp chili powder
1/2 teaspoon salt
1/2 teaspoon ground cumin
1/2 teaspoon dried oregano leaves
1/16 teaspoon pepper
6 corn or flour tortillas (I used flour ones)
1 1/2 cups shreeded cheese
sour cream
Cook and stir onion and garlic in oil in a skillet over medium heat until onion is tender. Stir in chicken broth, tomatoes, chili powder, salt, cumin, oregano and pepper. Heat to boiling; reduce heat. Simmer uncovered 1 hour.
Dip each tortilla into sauce to coat both sides (this is what will make the edges nice and crispy!). Spoon 2 tablespoons cheese onto each tortilla. (this is where I also put some corn in the center). Roll tortilla around filling. Place seam sides down in ungreased rectangular baking dish. Pour remaining sauce over enchiladas; sprinkle with remaining cheese.
Cook uncovered in 350 degree oven until cheese is melted, about 15 minutes. Serve with sour cream.


Strawberry Cupcakes Cooking Light


Cake
1-1/4 cups sliced strawberries
10 ounce all-purpose flour (about 2 1/4 cups)
2-1/4 teaspoons baking powder
1/8 teaspoon salt
1-1/2 cups granulated sugar
1/2 cup butter, softened
2 large eggs
2 large egg whites
1 cup low-fat buttermilk (I used regular buttermilk, couldn't find low-fat)
1/4 teaspoon red food coloring (I used burgundy which made the cupcakes a real bright hot pink)
Frosting
1/3 cup (3 ounces) less-fat cream cheese
1/3 cup butter, softened
2 tablespoons Grand Marnier, orange-flavored liqueur (I will use raspberry-flavoured liqueur)
3 cups powdered sugar
12 whole strawberries (optional)

Preheat oven to 350°.

To prepare cake, place sliced strawberries in a food processor; process until smooth.

Weigh or lightly spoon flour into dry measuring cups; level with a knife. Combine flour, baking powder, and salt, stirring with a whisk. Place granulated sugar and 1/2 cup butter in a large bowl; beat with a mixer at medium speed until well blended. Add eggs, one at a time, beating well after each addition. Beat in egg whites. Add flour mixture and buttermilk alternately to sugar mixture, beginning and ending with flour mixture. Add pureed strawberries and food coloring; beat just until blended.

Divide batter between 2 (8-inch) round cake pans coated with cooking spray. (I used paper lined cupcake pans and made 48 cupcakes). Bake at 350° for 30 minutes (20 minutes for cupcakes) or until a wooden pick inserted in center comes out clean. Cool in pans on a wire rack for 10 minutes. Remove from pans; cool completely on wire racks.

To prepare frosting place cream cheese, 1/3 cup butter, and liqueur in a medium bowl; beat with a mixer at medium speed until blended. Gradually add powdered sugar, and beat just until blended.

Place 1 cake layer on a plate; spread with 1/2 cup frosting. Top with remaining cake layer. Spread remaining frosting over top and sides of cake. Cut 1 whole strawberry into thin slices, cutting to, but not through, the stem end. Fan strawberry on top of cake just before serving, if desired. Cut remaining 11 strawberries in half. Garnish cake with strawberry halves, if desired.


vrijdag 22 mei 2009

Sauteed Peppers with Garlic and Thyme for Taste & Create XVIV

For this month's Taste & Create I was paired with KC from Kit's Chow. It didn't take me very long to find a couple of recipes that I wanted to try. As I had just brought home a huge bag of bell peppers and I absolutely love garlic my first pick was easy: Sauteed Bell Peppers with Garlic and Thyme.


This recipe was super easy and real tasty too! I absolutely loved the combination of the sauteed garlic and bell peppers with the balsamic vinegar!! Apparently I can eat loads of these, simply because a) Garlic is good for the cardiovascular system, offers protection against many cancers, offers protection against asbestos and promotes weight control and b) Bell Peppers offer protection against free radicals, reduce risk of cardiovascular disease, offer protection against rheumatoid arthritis, and appear to have a protective effect against cataracts.


Sauteed Peppers with Garlic and Thyme

6 Bell peppers
10 cloves of garlic, peeled and smashed
a couple of tablespoons of balsamic vinegar
a pinch of thyme
Olive oil

Turn the fire on medium and heat the pan. Add a bit of olive oil to sauté the garlic.
Add the peppers and sauté them until they are coated with oil and become limp.Stir the peppers and sprinkle some thyme over them. Turn the heat to low and cover the pan. Let the peppers cook for about ten minutes.Pour some balsamic vinegar over the peppers and toss to mix.Dish up. Serve at room temperature..

donderdag 23 april 2009

Taste & Create XVIII - Mirch Masala - Asparagus Spaghetti

This month I decided to join another interesting cookgroup: Taste & Create.
I had seen this event over at Grumpy's Honeybunch and instantely fell in love with the idea of Taste & Create: it’s whole purpose is to create a community of bloggers who test each others’ recipes and share links. Every month you send an email to let Nicole from For the Love of Food know that you'd like to participate that month, she makes pairs and then you select one (or more) recipes to recreate from the persons blog that you're paired with.


This month I'm paired with Superchef of Mirch Masala. Superchef is a very talented cook that has a lot of Indian recipes on her blog. My intention was to go ahead and try to recreate one of the lovely Indian dishes, but time flied this month and before I knew it it was time to post. As I was in a hurry today I made this easy-to-prepare pastadish.


I really enjoyed it, it was put together very quickly and very tasty. It gave me a chance to use my leftover spinach from the CEiMB-recipe. I absolutely loved it: the way the egg-parmesan mixture coats the pasta that makes an ordinary sauce completely absolete. Go here to check out Superchefs pasta. To see what the other creators made, visit Taste & Create.


Asparagus and Spinach Spaghetti with Garlic,
Basil and Parmesan Cheese


250 grams Spaghetti
300 grams Spinach
4 cloves garlic, minced
8-10 stalks of Asparagus, cut into 1 inch length
1 egg, beaten well
1/2 cup, grated Parmesan + more for garnish
a few basil leaves, chopped finely
a handful of sweet cherry tomatoes, halved
2 tbp Extra Virgin Olive Oil
salt and pepper, to taste

Cook the pasta as per package instructions, drain and keep aside.
In a sauté pan, heat the olive oil and sauté the asparagus, spinach and garlic.
Add the spaghetti to it and toss well.

Meanwhile, mix the egg and the grated parmesan in a bowl and keep aside.
Remove the sauté pan from the heat and then add in the egg-parm mix to it.

DO NOT add this mix while the pasta is on the stove as this will only scramble the eggs.
This way, the eggs cook enough in the heat of the pasta and forms
a nice smooth sauce with the parmesan.

Add salt and freshly ground black pepper to taste.
Toss in the cherry tomatoes and serve with the basil leaves and
more grated parmesan as garnish.